How to add GPX routes to your Garmin GPS watch
We show you how to harness one of Garmin's most helpful features in five steps.
If you go running or hiking in the wild, incorporating a GPX route into your Garmin watch is an excellent way to navigate. What's more, GPX route navigation is supported by a wide range of Garmin sports watches.
At Wareable, we've utilized this outstanding GPX feature for running in Dartmoor, where the paths can be unclear and signposts are sparse, as well as in central London, where we navigate through narrow roads and shortcuts. This makes it a truly versatile and powerful tool.
However, figuring out how to upload GPX routes to the Garmin watch is not straightforward. Check out our guide on how to do it.
- Best Garmin watches compared
Garmin devices that support GPX uploads:
- Fenix series
- Epix (2nd Gen) series
- Enduro series
- Descent series
- D2 series
- Forerunner 745
- Forerunner 970/965/955/945/935
- Forerunner 570/265/255/245
- Forerunner 655/645/630
- Instinct series
- MARQ series
- Tactix series
- Quatix series
Not all of these will provide you with actual maps, but you can still use GPS navigation to follow a directional route. TOPO mapping is only available on Fenix devices (including its derivatives, such as the Epix, Enduro, D2, Descent, MARQ, Tactix, and Quatix ranges) and the high-end Forerunner model.
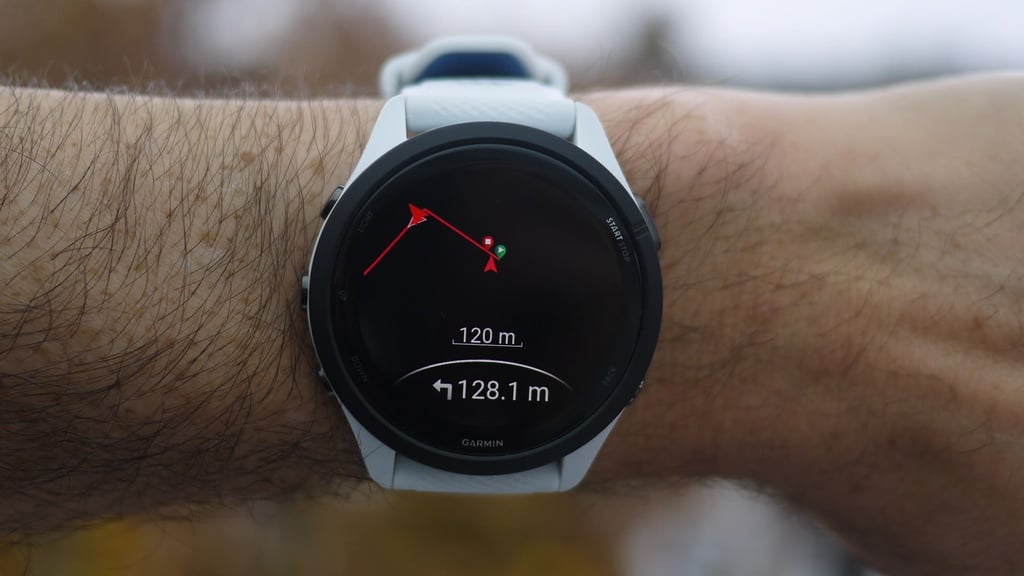
Even without mapping, you can utilize GPX waypoints to follow a heading. Hikers can take advantage of this feature for long, off-the-beaten-path walks, and it's incredibly reassuring to follow when the trail fades away and you're off-piste.
Quick overview: Add GPX routes to your Garmin watch
1. Download or create a GPX file and store it on iCloud/Dropbox/Google Drive.
3. Import the GPX file into Garmin Connect
4. Send the Course to your specific Garmin device and then sync.
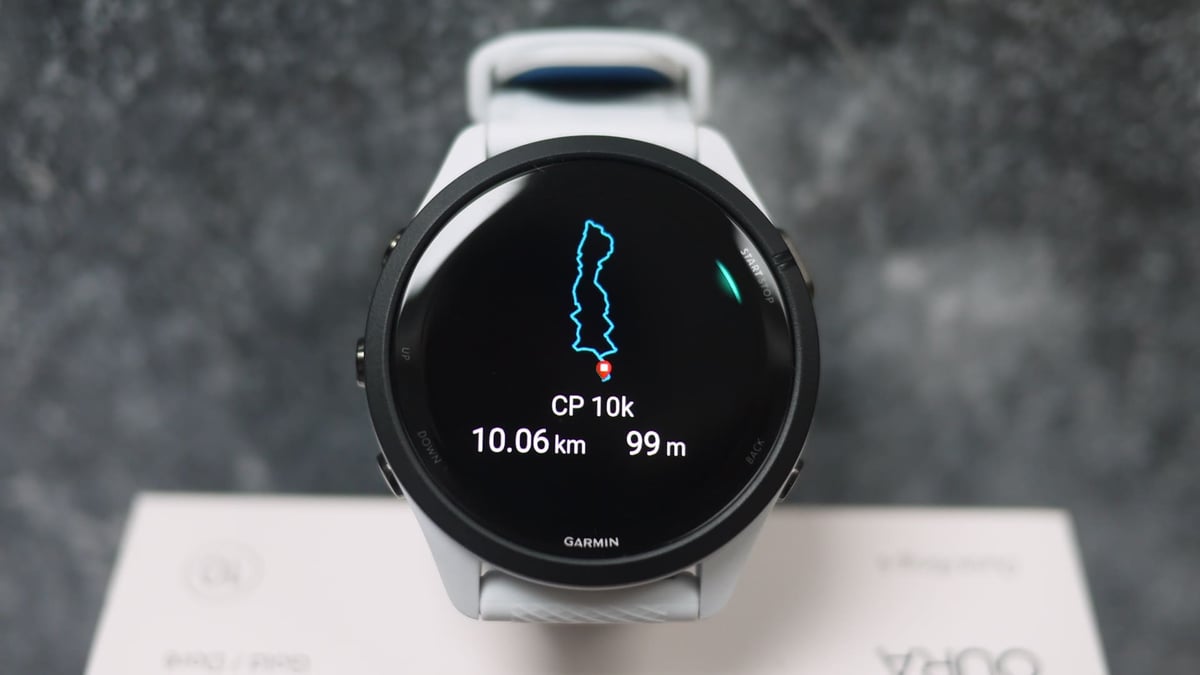
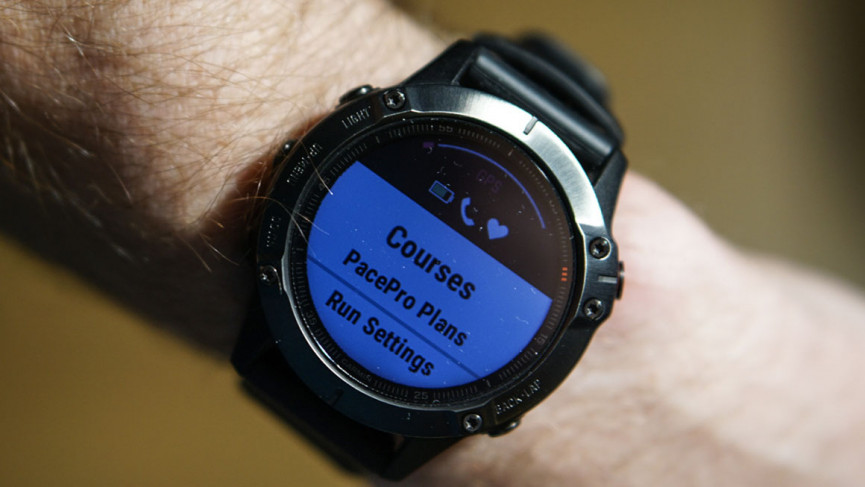
5. When starting an activity on your Garmin watch, head to Settings by holding the option button > 'Navigation' and then 'Courses' to start the workout with the route.
6. Cycle through screens until you get your GPX heading.
In-depth: Add GPX routes to Garmin watch
1. Download the Garmin Connect app and register
The Garmin Connect app on your phone will automatically sync courses to your Garmin device via Bluetooth.
You can create new routes using the phone app itself through Courses and import GPX files from third-party apps on iPhones and Android phones.
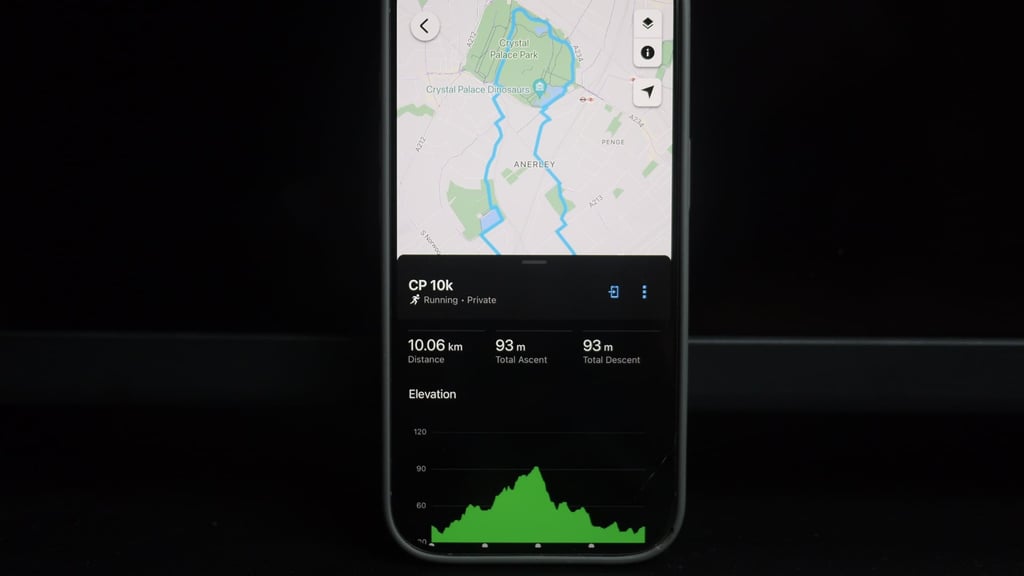
You can also import files from the Garmin Connect web app. The web interface offers a significantly easier-to-use system for reviewing and modifying navigational data and editing various features of the GPX course before sending it to your device.
2. Download or create a GPX file
Next, you'll need to get a GPX or TCX file containing your route and save it. If you're using iOS, I tend to save these to my Files folder. This makes it easy to follow the next step and send the route to my Garmin device. If you're using Android, your Google Drive will work fine.
If you don't opt for the impressive Garmin Trendline route builder or Courses, our favorite for building runs is Strava – however, in April 2020, this became a paid-for feature. You can also try Wander Map or Koomot.
You can also download GPX files from the web. The site wikiloc.com is an excellent source of routes with GPX downloads, and in the UK, you can grab them from GPS-routes.co.uk. There are loads of sites out there besides those.
3. Import the GPX/TCX file into Garmin Connect (app)
If you import GPX or TCX files via the Garmin Connect phone app, the process will slightly differ depending on whether you use an iPhone or Android phone.
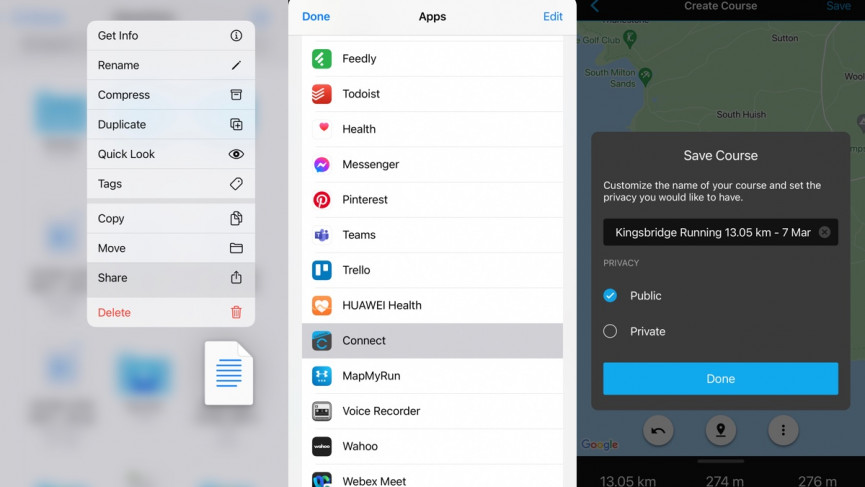
For iPhone users (see above), you must copy the file to iCloud Drive or Dropbox. Long-press the file and choose Share, and then you should have the option to 'Copy to Connect'.
You may have to expand to see the complete list of apps. Your iPhone needs to be running iOS 13 or later to do this. You can then name the route, choose whether it's public or private, and save the route to Connect.
If you have an Android smartphone, locate your course file, then select to open it with Connect, choose course type, and edit the name before saving.
4. Send to device
Ensure your watch is synced and in range. Next, go to the route that has been uploaded and saved to Garmin Connect, and press the small send button. It resembles a phone with an arrow (see above). Select your device, and the route will be transferred over.
5. Select the route via your Garmin device
There are two ways to get to the navigational routes stored on your Garmin device.
Start a new hike/run/cycle activity and then head to the 'Navigation' option in the activities menu before scrolling down to 'Courses'.
Here, you should see a list of the available routes synced to the device. Click on those, and you can view the map or start the course as an activity.
Get more from your Garmin with our in-depth guides